To setup Google MX records in cPanel follow the steps below.
Quick Steps
- Login to cPanel and click the Mail Routing icon.
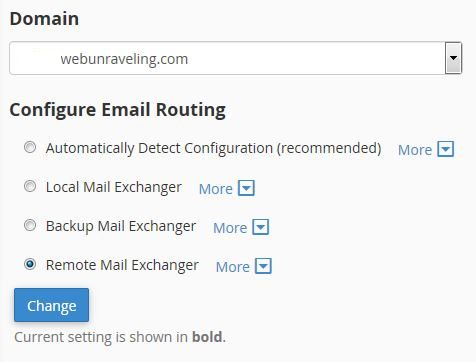
- Set routing to Remote Mail Exchanger.
- In the Zone Editor screen, enter the Google MX records.
- Repeat the for all the records and save them.
- Delete any non-Google MX records.
In this tutorial we will go over a few simple steps to configure your MX records to use GSuite (formerly Google Apps). Please note, you must have an active GSuite service in order for your mail to function properly.
The first step would be to log into your cPanel hosting account and locate the "Email Routing" icon under the Email pane as shown below.

Select your domain from the drop down menu and then select "Remote Mail Exchanger" and click the "Change" button.

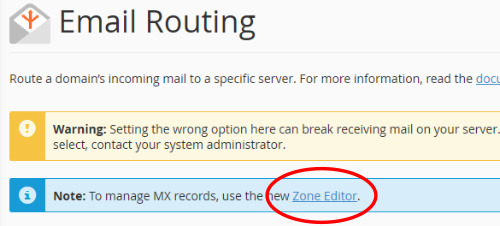
Now you'll need to add the Google MX records. Navigate to the "Zone Editor" to complete the following steps.

Open the dialogue to add a single MX record by clicking on "+ MX Record".

You’ll want to make note of the Google MX records shown below. These can also be found in Google's official documentation.
Priority: 1
Destination: ASPMX.L.GOOGLE.COM
Priority: 5
Destination: ALT1.ASPMX.L.GOOGLE.COM
Priority: 5
Destination: ALT2.ASPMX.L.GOOGLE.COM
Priority: 10
Destination: ALT3.ASPMX.L.GOOGLE.COM
Priority: 10
Destination: ALT4.ASPMX.L.GOOGLE.COM
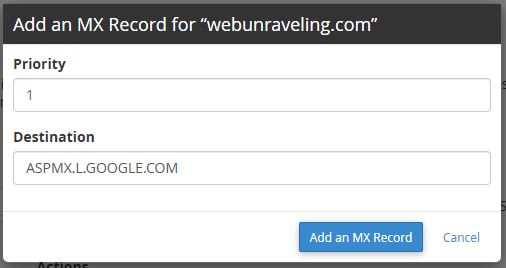
Enter the priority and destination into the corresponding boxes as shown below and click the “Add an MX Record” button.

Once you have added each of Google's MX records, you'll want to double check that all of the records were entered correctly. Click on "Manage" as shown below.

You should now see a list of every DNS record for your domain. To only show MX records, click on "MX" as shown below.

Double check to be sure you have entered all of the necessary Google MX records. Also check to be sure there are no other non-Google MX records listed. If there are any MX records, other than the ones you have just added, delete them.

That’s it! You’ve now configured your cPanel web hosting account to route emails to your GSuite account. It is recommended to allow up to 48 hours for the DNS changes to fully propagate. You can test by sending mail to your domain which should then go to your GSuite. Note, you must have an active, valid email address for your GSuite account that is accepting mail.
Should you have any problems, feel free to reach out to our support department.

